In order to improve one’s video quality it is important to have a basic understanding of how and why the camera functions the way it does. In previous post we’ve ventured through various technical and aesthetic aspects of video making, and in our posts about camera techniques we’ve touched upon one (potential) issue a lot of beginners experience when they start filming: backlight. Let’s take a deeper look into what backlight is, how you can prevent it and when it might even be an asset.
What is Backlight?
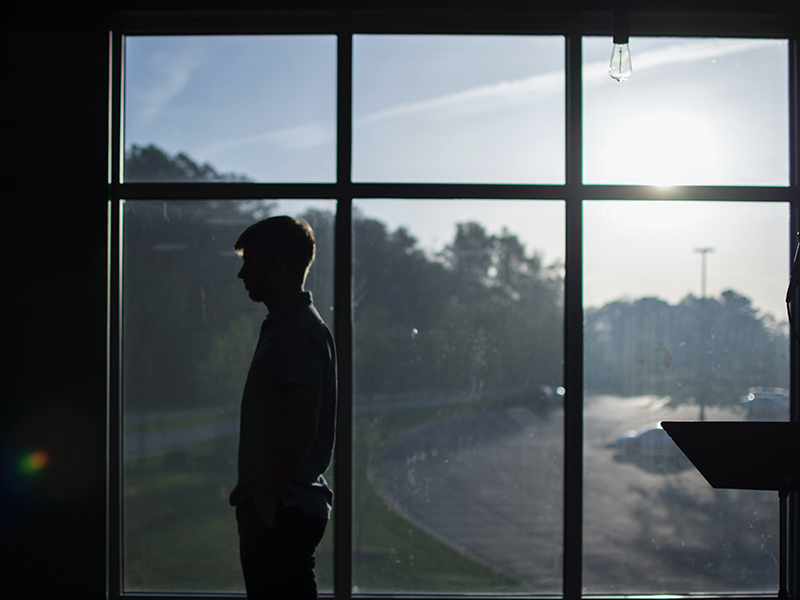
Simply speaking, backlight (or contre-jour for the cultivated) occurs when the light source behind your subject is brighter than the one casting light onto what you’re filming. It can happen while filming someone against a window on a bright day or just having excessive lamps in the background. The consequence of this is your subject appearing very dark, almost silhouette like, in the image while the background is instead bright and colorful. In many cases this isn’t a desirable outcome, while filming an interview for example you’d want to get a clear image of the one who’s talking. To better understand the technical workings that causes this, we need to explore the basics of how a camera function.
The basics of a camera
A camera is in its essence a box with a hole in it. When filming or taking a picture, light goes into the hole to project an image on a light sensitive surface at the back of the box, which is then translated into an image. Regardless of it’s an older analogue device or modern digital camera makes no difference; the camera makes a projection from the light that then turns into an image. Though to make this a reality, there also need to be other tools regulating the “flow” of light hitting the photosensitive back of the box.
Shutters
First are the shutters which can most simply be described as “blinds” that open and close each time a picture is taken. Depending on how long the blinds are open for affects the outcome of the image. Longer shutter speeds lends itself to images with a lot of motion blur (think of how images of busy traffic can display cars faint and translucent)..
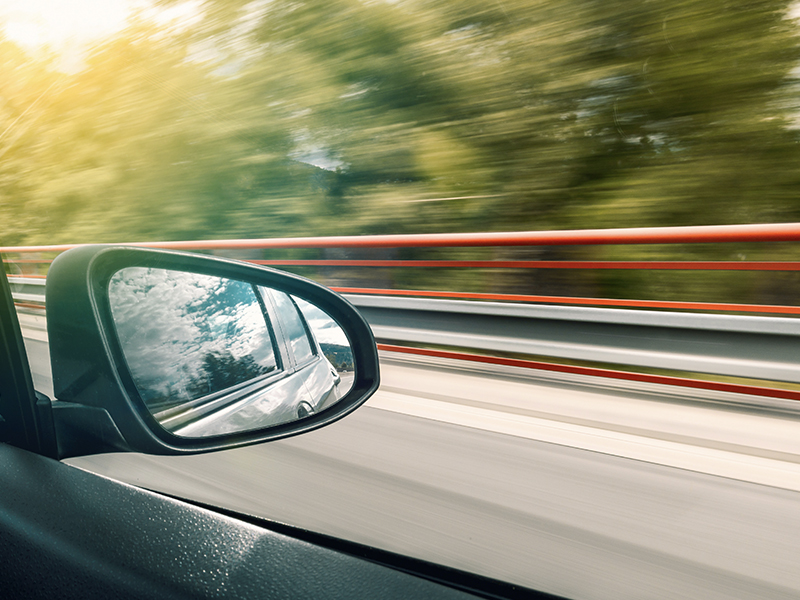
..while shorter shutter speed captures a more “still” motive (the cars are no longer blurry but visible with stark contours).

Aperture
Then there is the aspect of aperture which is a mechanic built into the lens of the camera. The aperture regulates how much light is let in at a time (think of how the pupil of the eye opens and closes depending on how bright the surroundings are). Aperture is measured in F-Stop units and in general a lower F-Stop (i.e. the “pupil” has a small opening) the more shallow the focus length will be in the final image, and vice versa.
So...
How does this relate to backlighting then? As shooting conditions vary from situation to situation the camera needs to adapt with them to produce good images or video. If the surroundings are dark, you’ll need to prolong the shutter speed in order to not get an image that is too dark. Likewise, if the environment is already bright and you keep the high shutter speed, you instead risk over-exposure, leaving an overly bright, blown out, image. And this is the corner stone to how backlight is created.
When filming someone against an overly bright background the camera sensor is flushed with light. Placed in between the light source and the camera the object then won’t get lit, as instead its shadow side is facing the camera. Since the camera only responds to the amount of light coming in it adapts to the brightest source, adjusting its settings accordingly. As it is calibrated after the heavy light intake, trying to prevent overexposure, the already unlit subject of the image then becomes even darker as the shutter speed is lowered, thus backlight occurs.

How to fix it
Now that we know how it happens, what can be done to prevent and fix it? The most obvious (and reliable) solution is to move either object or camera. Just as a bright window can be a hassle to shoot against, it is and equally remarkable light source when it lights the subject. Simply switch places so that the camera instead has its back against the window, letting the light hit the object instead. Not all situations are as simple though and depending on the circumstances it might not be possible to move everything around.
Most smartphone cameras offer the built-in feature to manually set the exposure focus, meaning you’re telling the camera to adapt after the subject instead of the background. This rarely works out well though, as the camera opening up to get a brighter view of the subject also accentuates the intake of the background light, resulting at best in a grainy subject surrounded by an overexposed backdrop.
Instead, if moving around isn’t an option, the only way of counteracting the backlight is to add additional light sources that illuminate the subject. This way the camera can find a good middle ground where both the background and the subject are displayed correctly. Depending on how bright of a background however this can be tricky as you might need a lot of lamps to match the surroundings. With trial and error, along with some creativity, most situations can usually be salvaged though.
Is backlight always bad?
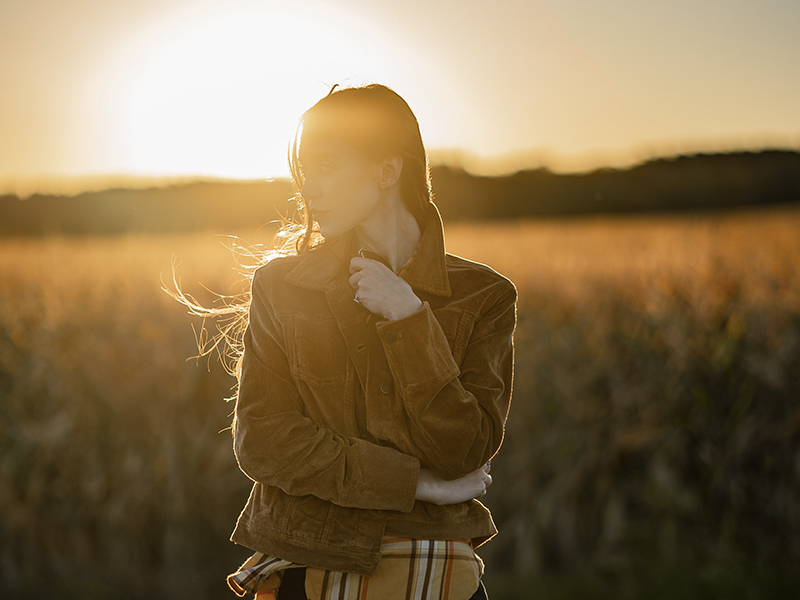
So is a backlit image always bad then? Absolutely not, there are an infinite number of ways one can use it to make creative imagery. Catching someone’s silhouette against a brighter landscape is a common trick of photographers, as well as accentuating different aspects of an object by having parts of it dulled while others are bright and even creating “halos” around the subject standing in front of the light source. These tricks might not apply to all or even most situations, but it is good to understand if you want to create better footage in the future.

To summarize
To summarize, backlight can be a nuisance as it sometimes limits your choices during a shoot. But understanding how and why it occurs can help manage it, as it gives you ways to work around the problem and even work with you instead. As with all things creative do and do again is the best way of mastering these situations. By testing out filming with different lighting setups and various locations you’ll soon develop a thorough understanding of how your camera responds to all types of situations.
Author