

When producing video content for your business marketing mix, it’s not uncommon to involve experts (or otherwise) outside the company. In fact, it’s very much encouraged to reach a wider audience and earning trust.
So you want to record a video interview between yourself and this external expert, BUT…. it’s not a viable option to meet up in person.
This happens sometimes. It could be because of clashing schedules, parents having to stay home with their children, or… a global pandemic keeping everyone at home.
Not to mention that in the internet savvy age of today, you should never feel limited to the experts in your area.
Video call apps

Holding and recording video interviews over different video call apps is becoming more and more common.
Unsurprisingly, these video recordings will not hold the same quality as a studio production with professional cameras.
But when you’re working against the clock, trying to create meaningful content for your marketing mix – and fast – video quality can consciously be ignored.
(Unlike audio, which needs to stay crispy. More on that later)
Simon Sinek, author and inspirational speaker, said the following in a post on Linkedin:

Of course, the downside to making and recording video content over video call apps is of course that you, as the producer, lose a lot of creative control. You’re locked in by:
- -The video call format
- -Your interview subject’s hardware situation
In this article we will list some low effort tweaks that greatly improves the audiovisual quality of your video call.
So here we go! Here is how to perfect video call recordings for video productions:
Frame yourself like a portrait

One of the most crucial components to getting good image quality is to determine what is going into the image!
While it might be considered acceptable to have bad framing during a casual video call, the same cannot be said for a video production scenario.
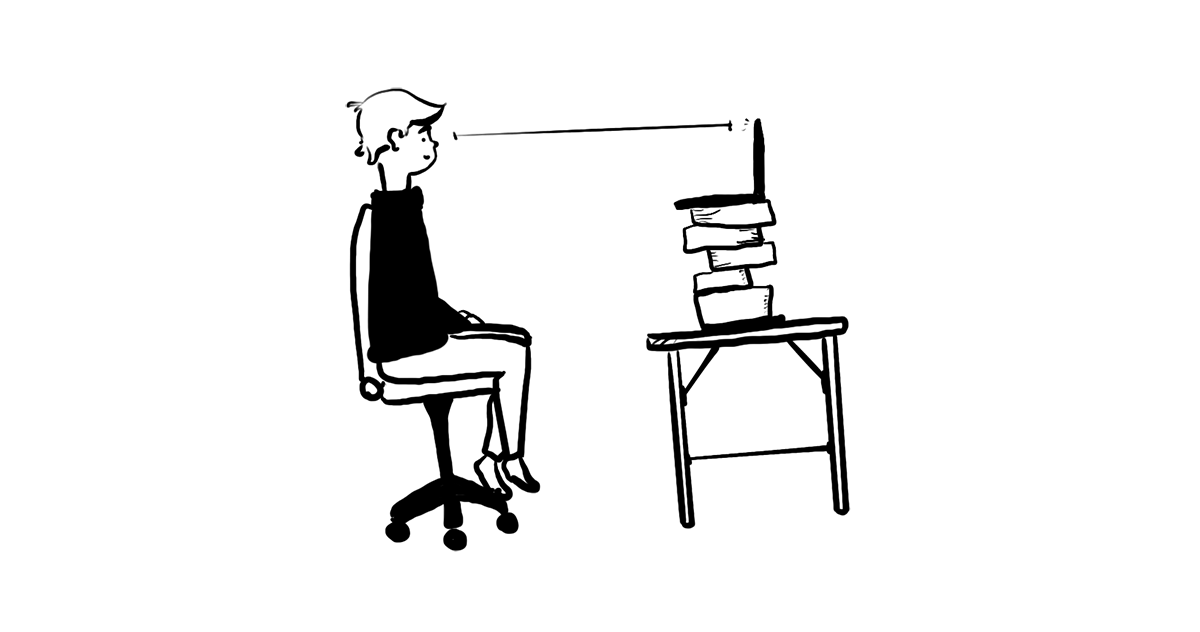
Direct your interview subject to place their camera so that they are framed in the middle of the screen. Additionally, try not to have them too close or too far away from the camera.
Aim for a frame where the entire head is in view, as well as the top of the shoulders (see image above). Try to keep in mind having some “air” left above the head as well, as it helps the image “breathe”.
Another key component to a good framing is: eye levels.
If your subject is looking up at, or down on, the camera (the viewers), you’re creating a scenario where the viewers are either looking down on you, or vice versa. It gives off a weird vibe, and has the potential to change the perceived message of the video.
Try having the camera stacked up and placed at your subject’s “natural” eye level. This will create a nice and neutral image.
Have a look at this episode of our educational series on videography and communication for more information about video composition.
At least “decent” lighting
Most built-in webcams are of relatively poor quality, offering low resolutions and almost no customization for the user. In order to make the most of their limited range, good lighting is a key factor.
Light is of course crucial in most video productions, but when it comes to online video calls it is a necessity if you want to avoid looking at a dark, pixelated mess.
We’re not necessarily talking about a professional three-point light setup (learn more about that in our educational episode about lighting here). That might be too demanding to ask of your interview subject (depending on who it is and what kind of equipment they have).
But there are some lower effort, quick fixes that can get you a long way.
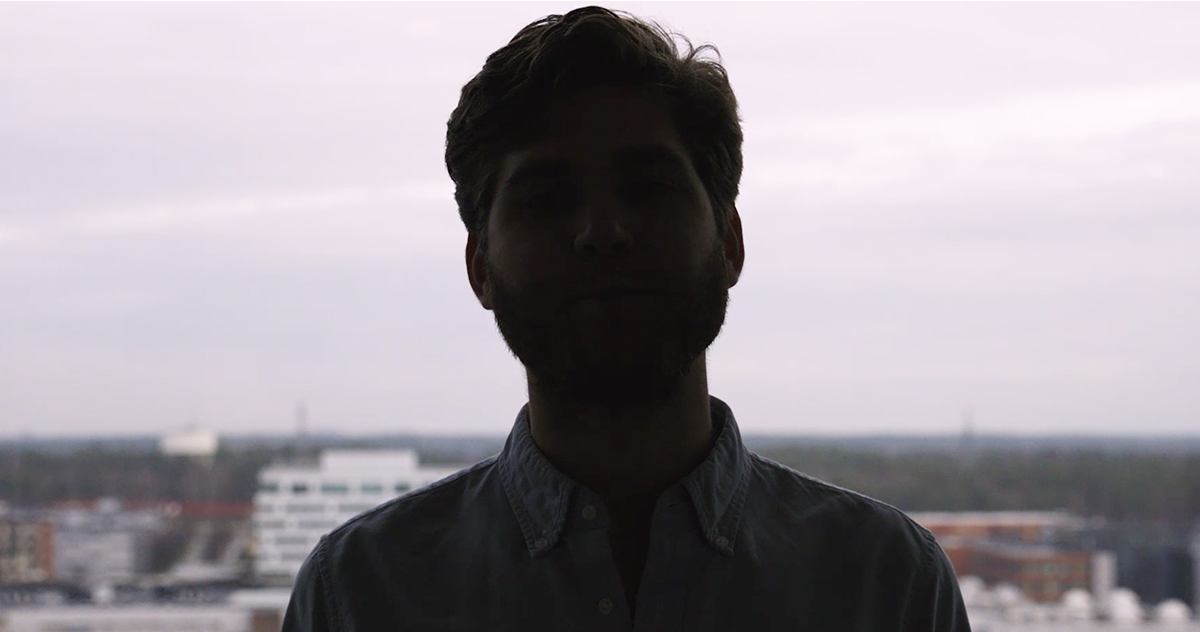
First and foremost, make sure they avoid having a bright light source behind them (most typically a large window). This will create backlight, which will turn their silhouette dark and menacing.
Try instead to turn the tables (sometimes literally), and have the person face a window instead. Natural daylight illuminates your subject evenly and ensures that the white balance (the balance of color temperature in your image) is matching the background as well.
If your subject doesn’t have a window anywhere near where you’re filming, or if it’s too dark and gloomy outside to give enough light, try using an external light source behind the subject’s screen.
Just remember to not over-do it. Too much light can also ruin a shot. Go by what you can see on screen. Does it look ok? Go for it. Or move around and try different things until it looks better. It’ll be worth it for the end product.
Don’t underestimate the value of good audio
Watching a video with bad image quality can be frustrating…. But nothing is as frustrating as not being able to hear what the people in the video are saying. That’s unforgivable.
Similarly to what we said about camera quality, the default microphones of most computers aren’t ideal for recordings such as these. But there are, of course, ways to circumvent this as well.
Today, most people have headphones and headsets with built-in mics. Utilizing them during a video recording vastly improves the audio quality as the microphone gets closer to the mouth, and therefore your voices become more focused.
This does come with the caveat that the person becomes dependent of those headphones, which can affect other parts of the recording. Being “tied” to the computer by a cord limits the person’s ability to frame themselves freely, and while wireless headphones solve this, they instead come with new issues, such as shake-y Bluetooth connections and battery life.
Usually these aren’t major issues, but if you feel the need to look for another solution, you could always ask the interview subject to start an external recording of the conversation.
Ask them to start a voice memo on their phone before the interview starts, and to place the phone close-by and aimed at themselves.
Note: if they place the phone on a table surface, remember to remind them to not disturb the area, by typing or placing coffee cups on it during the interview.
You now have a back-up audio file that you can use if the computer audio falters.
Related to this: here’s our educational episode on lav mics.
Aesthetics and environment

We’ve gotten through the most important bits. But if you want to focus on details, like the “vibe” of the shot, it could be a good idea to ask your interview subject to tidy up their background before you start recording.
Placing your subject in front of different backgrounds can change the look and feel of the entire video. If you want an aesthetically pleasing background, place your subject in front of a nice plant or bookshelf. If you want complete focus on the person and what they’re saying, choose a more neutral background.
Most video chat apps today can generate background filters (blurry background or an image). This could be a nice back-up solution. It could also look terribly tacky, and bring too much attention to the software you’re recording the interview from.
Final thoughts
Overall, common sense and basic video making logic goes a long way when recording video calls. An added benefit of doing interviews remotely is that the subject is in a familiar environment, usually resulting in them being more relaxed, and being able to answer your questions with more thought and less angst.
Essentially, communication is key, and through some trial and error, video call recordings can prove to be much more of blessing than a curse.

